Accessible Bathroom Remodel: Aging in Place Without the Hospital Look
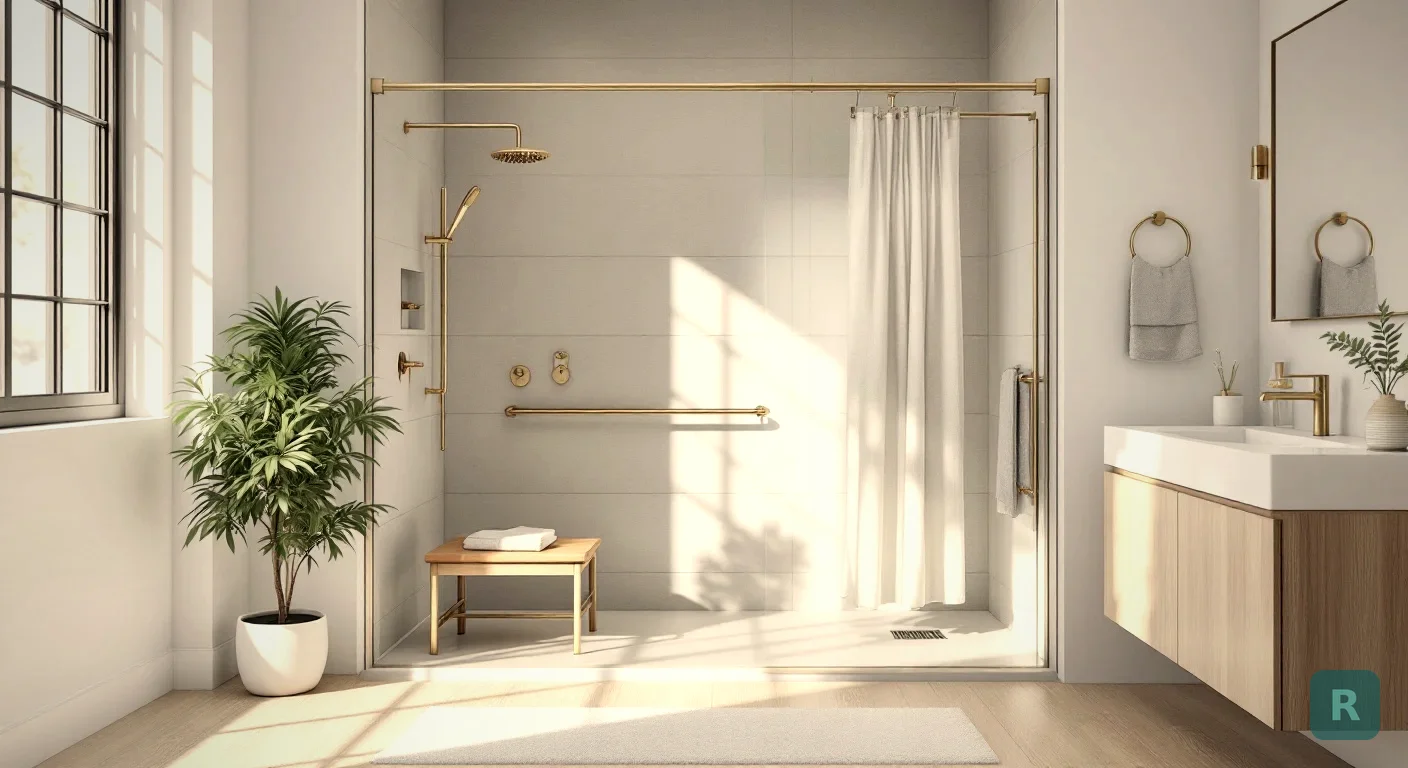
- Most of an accessible bathroom is decided inside the walls and under the floor, before the tile goes on
- Block every wall for grab bars while it's open, even if nobody needs a bar yet
- A curbless shower, a 32 inch door and a 60 inch turning circle are the three things you can't easily add later
- ADA numbers are a solid reference for a home, but a private house doesn't have to meet them, so fit the room to the person
- Accessible doesn't have to look clinical. See it on a photo of your own bathroom before you commit
Here’s how a lot of accessible bathrooms start. Mom slips getting out of the tub. She’s fine, but the family is scared, and somebody wants a grab bar up by Friday.
A grab bar screwed into drywall is worse than no grab bar at all. It holds until the day somebody actually puts their weight on it, and then it rips out of the wall in their hand.
That’s the whole problem with how most accessible bathrooms happen. They get built in a panic, after a fall, one piece at a time. Done right and done ahead of time, an accessible bathroom looks like a nice modern bathroom that happens to be safer for everybody who uses it.
Who an Accessible Bathroom Is Really For
Most people hear “handicap bathroom” and picture a wheelchair and a hospital rail. That’s one case. The more common case is a homeowner in their 50s or 60s who plans to stay in the house for the next 25 years and wants the bathroom to work at 85, too.
So who’s it for?
- Aging in place: you’re healthy now and remodeling once, so you build it for later while the walls are open
- A parent moving in: someone with balance or strength issues needs it now, and the timeline is tight
- A wheelchair or walker user: this is where clearances and heights really matter, and where a designer or occupational therapist earns their fee
- Everybody else: a curbless shower and a bench are just as nice for a 35 year old with a bad knee or a parent bathing a toddler
The first group gets the best result for the least money.
The Work Nobody Sees: Blocking, Doors and Valves
I’ve spent 20+ years as a carpenter, and the stuff that makes a bathroom safe is mostly framing. Get the framing right and the finishes are easy. Get it wrong and you’re cutting into new tile later.
Block every wall for grab bars
Grab bars have to be anchored into solid wood, not drywall and not tile alone. While the walls are open, I want solid wood blocking between the studs everywhere a bar might ever go: around the toilet, the whole shower, and next to the tub if one stays. Some contractors sheathe the entire wet area in plywood instead, so a bar can land anywhere.
Blocking costs a few hours of labor and a few boards. Adding it after the tile is in means tearing out tile. If you do nothing else on this list, do this one, and take photos with a tape measure in the frame so you know where the wood is later.
Make the door wide enough
The ADA reference is a 32 inch clear opening, measured with the door open 90 degrees. A standard 30 inch door doesn’t get you there, because the door’s thickness and the stop eat into the opening. That usually means a 36 inch door, which means a new header and a bigger rough opening.
If the room is tight, a pocket door gives you the width without a door swinging into the space you need. An outswing door means you can still get in if somebody falls against it.
Move the shower valve
This one is small and almost nobody does it. Put the shower controls near the entry, not under the shower head, so you can turn the water on and get it warm without standing in the cold spray. For someone who’s unsteady, that’s one less reason to rush.
Showers also need a pressure-balance or thermostatic valve under the plumbing code, which keeps the water from suddenly going scalding when somebody flushes. Ask for one with a temperature limit set, and a lever handle instead of knobs.
Going Curbless: The Shower Is the Whole Ballgame
The tub wall is where most bathroom falls start. You’re lifting one wet foot over a 15 inch tub wall onto a slick surface. Getting rid of that step is the single biggest safety upgrade in an accessible bathroom.
There are two levels of this:
- Low curb walk-in shower: a small curb, an inch or two, which you step over. Easier and cheaper, fine for someone who walks steadily
- Curbless (zero threshold) shower: the floor runs straight in with nothing to step over. Needed for a wheelchair or a shower chair you roll in, and the better choice for aging in place
Curbless means the shower floor has to slope below the bathroom floor, which means cutting a slab or recessing the subfloor between the joists. I covered how that works in my post on modern bathroom renovations, and if you’re starting from a tub, read the tub to shower conversion guide too.
With no curb, water can reach the bathroom floor. The waterproof membrane needs to run past the shower opening, and a linear drain at the entry or back wall helps keep the water where it belongs. In the Pacific Northwest I've opened floors that were rotten from a slow shower leak nobody noticed for years.
Inside the shower, add these:
- Handheld shower on a slide bar, so someone seated can use it, with a hose long enough to reach the bench
- A bench, built in or a fold-down seat mounted to blocking
- Smaller floor tile or a textured finish, since more grout lines mean more grip under a wet foot
- A niche at seated height, so nobody bends or reaches across the spray for the shampoo
The Numbers That Matter
These are the reference numbers from the 2010 ADA Standards for Accessible Design. A private home doesn’t have to meet ADA, which was written for public buildings. Use them as a starting point, then adjust for the actual person, because a 5 foot 2 grandmother and a 6 foot 4 husband don’t need the same toilet height.
| Item | ADA reference | Typical bathroom | Easy to change later? |
|---|---|---|---|
| Door clear width | 32 in minimum | About 28 in from a 30 in door | No, new header |
| Turning space | 60 in circle | Rarely there in a hall bath | No, layout change |
| Grab bar height | 33 to 36 in to the top of the bar | None, or a towel bar | Only if blocked |
| Toilet seat height | 17 to 19 in | About 15 in on a standard bowl | Yes, swap the toilet |
| Toilet center from side wall | 16 to 18 in | 15 in minimum under residential code | No, move the flange |
| Sink rim height | 34 in maximum, with knee space | Cabinet vanity to the floor | Yes, new vanity |
| Roll-in shower threshold | 1/2 in maximum | Tub wall or 4 in curb | No, floor work |
The items marked “No” are the ones to settle before demo day. Everything marked “Yes” can wait until it’s needed.
The 60 inch turning circle is the one that surprises people. Most hall bathrooms are 5 by 8 feet, and with a tub, toilet and vanity in there, nothing close to 60 inches is open. A wheelchair user needs it. Someone with a walker needs something near it. For everybody else, a curbless shower borrows floor space, because the shower floor becomes part of the room.
How to Keep It From Looking Like a Hospital
This is the part that stops people. They picture stainless rails, a plastic shower chair and white everything, and they’d rather risk the tub. It doesn’t have to look like that anymore.
A few ways to get there:
- Match the grab bars to the faucet. Brushed brass, matte black and nickel bars are easy to find now
- Use bars that do double duty. Some are built into towel bars, toilet paper holders and shower shelves
- Go warm. Wood tones on the vanity and bench keep it from feeling clinical
- Light it well. Bright, even light plus a low night light on the path from the bedroom
See It Before You Commit
Here’s the honest problem with this kind of remodel. The person who needs it most is usually the one most against it, because they’re picturing the hospital version. Nobody agrees to a bathroom they can’t picture.
Most contractors aren’t designers, and I’m not either. For years I’d send people to Pinterest and show them photos of my past jobs, but that never showed them their own bathroom. I built ReVision AI to fix exactly that. Take a photo of the bathroom as it is today, pick a style, and see it transformed. Try a modern or Japandi look from the style list and type in “curbless shower, grab bars, shower bench” as a custom prompt. Show Mom her bathroom, not a catalog. The gallery has before and after examples.
If someone uses a wheelchair or has a specific condition, have an occupational therapist look at how they move before you lock in heights. If you're moving plumbing or changing the layout, a bathroom designer is worth the fee. For real cost numbers on a full remodel, see my master bathroom remodel cost breakdown.
Your Accessible Bathroom Checklist
I ask myself one question on every job: if this was my mom’s house, how would I want it done? For an accessible bathroom the answer is simple. Plan it before the fall, not after.
Aging in place years from now, or someone who needs it this month? That sets the scope and the timeline.
Door width, curbless shower, toilet location and turning space. These can't be added cheaply later.
Snap a photo and try a few styles in ReVision AI so the person using the room is on board before demo.
- Block every bathroom wall for grab bars while it's open, and photograph it with a tape in the frame
- Ask your contractor whether the floor is slab or wood joists, and what curbless means for it
- Get a 32 inch clear door, using a pocket door if the room is tight
- Move the shower controls toward the entry, with a lever handle and anti-scald valve
- Plan a handheld shower on a slide bar and a bench mounted to blocking
- Choose slip-resistant floor tile, smaller in the shower
- Pick grab bars that match your faucets so the room looks finished, not medical
Curious what an accessible bathroom would look like in your house? Try it free with ReVision AI and get 3 free transformations, or see what Pro includes on the pricing page.
Get Design Inspiration Weekly
Fresh room makeover ideas, renovation tips, and style guides delivered to your inbox.
Design tips and inspiration only. Unsubscribe anytime.
Related Articles
House Modification for Aging in Place: What to Change, Room by Room
A house modification plan for aging in place: ramp math, door widths, first-floor living, kitchen changes and who helps pay, room by room, from a carpenter.
9 min readGAF Virtual Remodeler: How to Use It and What It Won't Tell You
How to use the GAF Virtual Remodeler to try shingle colors on a photo of your own house, the photo tips that matter, and what to check before you buy.
7 min readGreen Remodeling: What Actually Saves Energy, Water and Waste
Green remodeling from a third-generation carpenter: keep what works, fix the walls while they're open, pick efficient fixtures, and skip the eco upsells.
8 min read